--

Showing posts with label SonarQube. Show all posts

Thursday, 27 September 2018

Part 2 : Using SonarCloud with Travis CI auto build trigger


If you go through previous section 
Part 1: Travis CI introduction that would be helpful to follow my steps from this article.


Step 1 : Creating a user authentication token for your account on SonarCloud

     If we want to enforce security by not providing credentials of a real SonarCloud user to run your code scan, we have to provide a User Token as a replacement of the user login. This will increase the security of your installation by not letting your analysis user's password going through your network.


Step 2 : Encrypting generated Sonar token


      The easiest way to encrypt Sonar token with the public key is to use Travis CLI. This tool is written in Ruby and published as a gem. Please follow the link Install gem

Note : I suggest to use mac system to install gem if possible that would be easy to install & generate key.

travis encrypt SONAR_TOKEN

The above command generates encrypted Sonar token to use in travis.yml file

Step 3: Get SonarCloud.io Organization 


you want to push your project on and get its key


Step 4 : 


We have to create a sonar-project.properties file to the root folder of Android application.

sonar.projectKey=Same project key from the SonarCloud project

sonar.projectVersion=1.0

sonar.host.url=https://sonarcloud.io

sonar.organization=organization key from SonarCloud

sonar.projectName=Same project name from the SonarCloud project

sonar.login= SonarCloud Username

sonar.password= SonarCloud Password

# =====================================================
# Meta-data for the project
# =====================================================
sonar.sourceEncoding=UTF-8

sonar.sources=src/main/java

sonar.java.binaries=build

sonar.binaries=build

sonar.language=java

sonar.profile=Android Lint


Step 5: 

Add the following lines to your .travis.yml file to trigger the analysis.


Whenever user pushed to the specified branch in yml file, the sonar analysis triggers & generates measure data in “https://sonarcloud.io/


Please feel free to share your queries.

Happy coding !!!

Monday, 27 August 2018

Part 2 - Centralized Sonar Analysis - SonarCloud Android integration


Please refer Part 1 - Monitoring code quality of your Android application with SonarQube for better understanding,
https://akcjayaprakash.blogspot.com/2018/07/monitoring-code-quality-of-your-android.html

Instead of local Sonar, we are creating the project in “https://sonarcloud.io/” by clicking + icon at the top right corner.


Enter ‘Project name’ & ‘Project key’ then click ‘Create’. We must use the same given Project name & Project key in sonarqube.gradle

There is no change for adding Sonarqube plugin to the project & app level Gradle files. We should update the proper SonarCloud configuration in sonarqube.gradle

property "sonar.host.url", "https://sonarcloud.io"
property "sonar.projectKey", "Same project key from the SonarCloud project"
property "sonar.organization", "organization key from SonarCloud"
property "sonar.login", "Unique token created by SonarCloud"
property "sonar.projectName", "Same project name from the SonarCloud project"


Use remaining properties of the sonarqube.gradle from Local sonar implementation.


After building or syncing project, open a Command Prompt and navigate to the app module directory of your project where your Gradle file is located.

Execute gradlew sonarqube and wait until the build is completed. Here we go,


The Android project for Centralized Sonar Analysis is pushed to SonarCloud. The measures of Android project contains code smell, lines of code, issues, and etc.


Please feel free to post any queries,doubts or suggestions in the comments section.

Wednesday, 11 July 2018

Part 1 - Monitoring code quality of your Android application with SonarQube

Why SonarQube?


SonarQube (i.e. SonarQube.org) is a powerful tool to monitor and analyze code quality, security and reliability. It is a continuous inspection engine and offers reports on duplicated code, exception handling, coding standards, code smells, unit tests, code coverage, code complexity, potential bugs, comments, design, and architecture etc.

SonarQube supports 20+ programming languages. Plugins for some languages (Java, JavaScript, Kotlin, Objective-C, PL/SQL, PHP, and Python) are bundled with the platform. To analyze a different language, we can install the plugin. As Android projects are based on Java sources, it is possible to analyze such projects with SonarQube.

The usage of SonarQube is limited to a local instance (i.e. Running Sonar in local machine). Doing the same against a remote server (i.e. Sonarcloud, centralized sonar) shouldn’t be a problem once you have understood the basics.

Installing SonarQube to a local machine


1. Go to https://www.sonarqube.org/downloads/ and download the latest version of Sonarqube by clicking on Download Latest.
2. Unzip the downloaded archive.
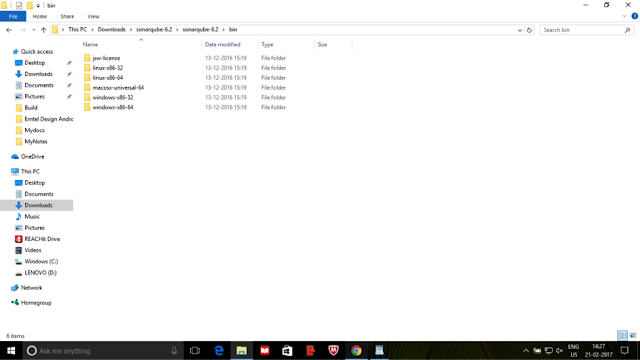
3. Go to sonarqube-/bin folder. You will see different folders based on platforms.


4. Open the corresponding folder according to your platform. There you should see a batch file named StartSonar for windows (or sonar.sh for other platforms)
5. Double click on StartSonar batch file. This will open a sonarqube console. Wait for the execution to complete and then you will see the message ‘Process[ce] is up’ and ‘SonarQube is up’.
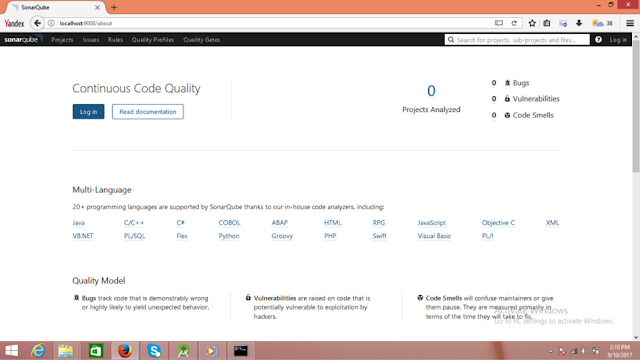
6.Open localhost:9000 on a browser. You will see Sonarqube web page.


Adding Sonarqube configuration in gradle

1. Add sonarqube plugin to for project level Gradle file (i.e. build.gradle of root folder) of your project.

            dependencies {
               classpath "org.sonarsource.scanner.gradle:sonarqube-gradle-plugin:2.6.2"
            }

2. Add sonarqube plugin to for app module Gradle file of your project.

          apply plugin: 'org.sonarqube'
          apply from: '../sonarqube.gradle'


3. By adding sonar configuration to separate Gradle file ‘sonarqube.gradle’

// recommend specifying the flavor once and dynamically adapt paths to it
def flavor = "Project flavor"
sonarqube {
properties {

def libraries = project.android.sdkDirectory.getPath() + "/platforms/android-22/android.jar" 

property "sonar.host.url", "http://localhost:9000"
property "sonar.projectKey", "package of Android app"
property "sonar.projectName", "Name of project"
property "sonar.projectVersion", “Project version”

property "sonar.sourceEncoding", "UTF-8"
// first defines where the java files are, the second where the xml files are
property "sonar.sources", "src/main/java,src/main/res"
property "sonar.binaries", "build/intermediates/classes/${flavor}/debug"
property "sonar.libraries", libraries
}
}

sonar.projectKey - Contain any unique key name (i.e. Package name of Android App) for your project. It should be different for every project you are analyzing with Sonarqube. 

sonar.sources - Contain the path of java files and xml layout files.

sonar.exclusions - Used to exclude directory/files from being analyzed by Sonarqube.


4. After building or syncing project, open Command Prompt and navigate to app module directory of your project where your Gradle file is located. Execute gradle sonarqube and wait until the build is completed.
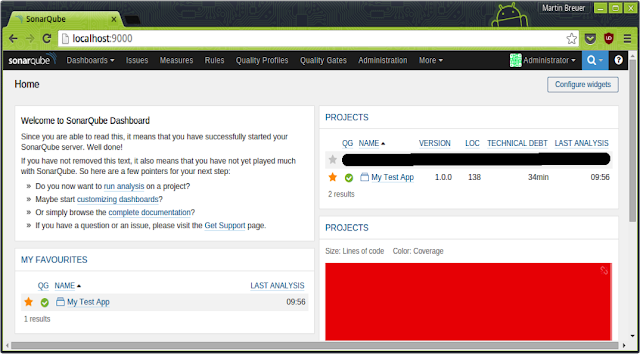
5. Refresh or open localhost:9000 web page on the browser. You will see your project added.

Understanding Sonarqube analysis


At the top right of the web page, you will see a login option. You can log in as an administrator by using both username and password as admin.
On Home page you will see the count for the number of projects being added to sonarqube and number of bugs, Vulnerabilities and Code Smells.

Bugs

Bugs track code that is demonstrably wrong or highly likely to yield unexpected behavior.

Vulnerabilities

Vulnerabilities are raised on code that is potentially vulnerable to exploitation by hackers.

Code Smells

Code Smells will confuse maintainers or give them pause. They are measured primarily in terms of the time they will take to fix.

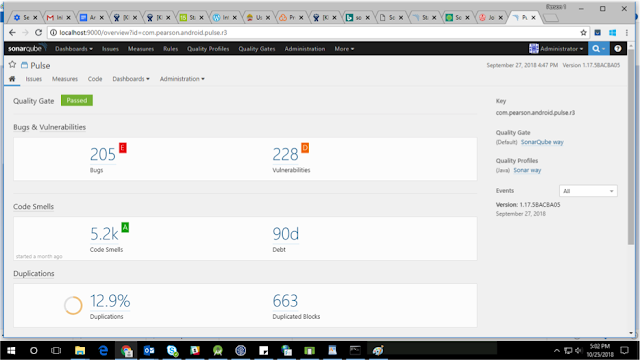
When you will navigate to Projects tab you will see projects being rated from A to E on the basis of Reliability, Security and Maintainability where A being best and E being the worst. Also, you will see the percentage of duplications in the code and the size of the code in terms of a number of lines of code.


Quality Gate

Quality Gate is the set of conditions the project must meet before it can be released into production. You can see whether your project is passed or failed in terms of Quality Gate.


Rules

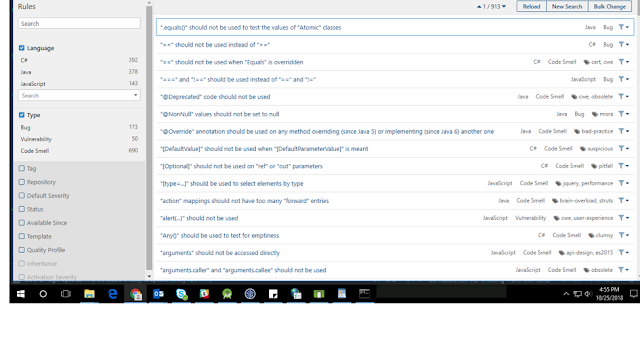
Sonar has a set of rules to validate source code standard of the Android application. When you will navigate to Rules tab, you will see the list of rules on the basis of which inspection is done. In the left panel, you can apply various filters to list rules on the basis of language, type, tags etc.


Issues

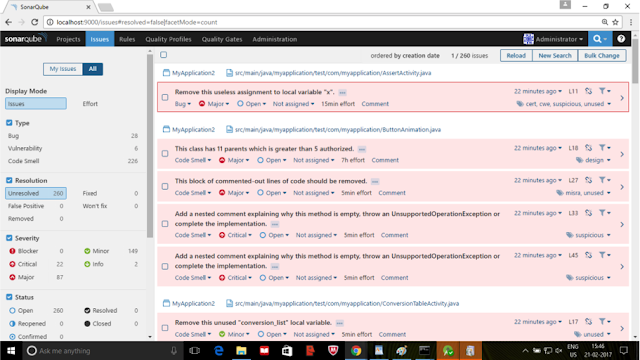
When you will navigate to Issues tab, you will see a list of various issues your projects has. When you will select Effort in Display Mode you will see estimated time required to handle these issues.


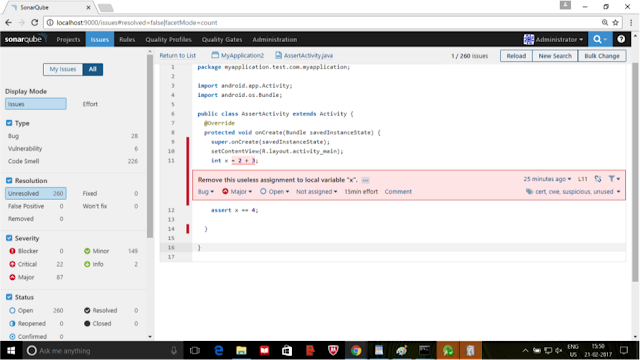
Clicking on the arrow at the right end of an issue will take you to the line in your code where the issue is found.


Administration


Administration tab section allows you to edit global settings for this SonarQube instance.
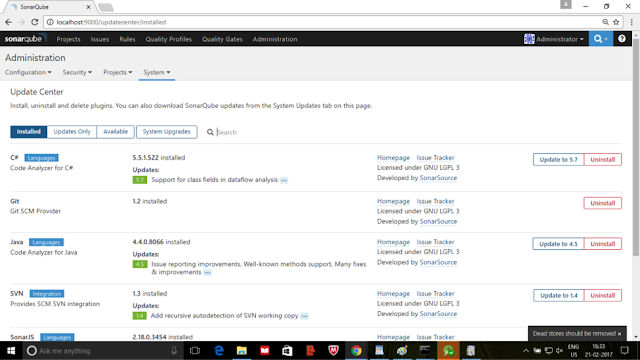
In the Administration section, click on the System tab and go to the Update Center. Here you can install various plugins.

In the Installed section you will see plugins which are already installed. In Updates Only section you will see updates for various installed plugins.

In the Available Section, you will see various plugins which are available to install.You can install plugins for various languages which you want to support.Also there are plugins for various external analyzers like FindBugs which provide Findbugs rules for analysis of Java projects.


Please feel free to post any queries, doubts or suggestions in the comments section.


References

https://medium.com/@sandeeptengale/integrate-sonarqube-for-android-application-development-8e40ec28e343
https://androidlearnersite.wordpress.com/2017/02/21/integrating-and-understanding-sonarqube-in-android/
https://room-15.github.io/blog/2016/01/21/Static-code-quality-measurements-with-SonarQube-Jacoco-and-UnitTests/
https://sogilis.com/blog/sonarqube-android-projects/